Post written by Jaeyoung Lim
Project by Jaeyoung Lim, Keunwoo Park, Dongho Kang
Overview
The Zipcar was an experimental project towards a more instinct interface from the conventional RC stick based interface for FPV driving experience. A racing wheel for gaming was used to control a remote control car providing onboard first-person-view(FPV) Video and data such as speed, heading. A Ardurover was used to control the car communicating with MAVLink. The final result was a very immersive and fun interface for experiencing driving.
System Layout

The system consists of a rover and the ground station. The rover includes a onboard computer that is capable of communicating with the ground station computer using MAVLink. The decision to use MAVlink was to be able to expand the system in to haptic or other applications. MAVLink is communicated on the 433MHz band. Mission Planner was used for the to send commands from the racing wheel and receive data from the rover. The tutorial in how to do this is included in this link. The onboard camera on the rover sends video telemtry to the ground station on the 1.2GHz band.
Components
- Racing Wheel : Logitech
- Rover : Turnigy 4X4 short course truck
- Onboard Computer : HKPilot Mega(APM 2.7) – Camera : Gopro Hero 3 – Video Telemetry :
- MAVLink Telemetry : HKPilot Telemetry Set
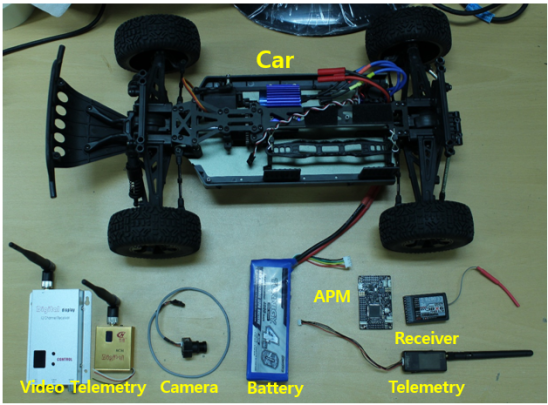
Rover


A Gopro was mounted using 3D printed brackets to mount the gopro on the rover. The 3D printed parts were modified from the 3D files from thingiverse.com.
Ground Station
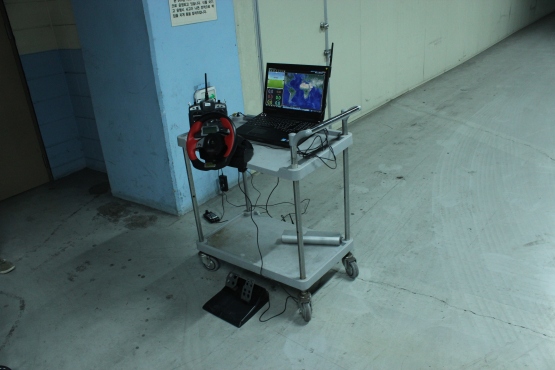

 Mission Planner was used to receive commands from the racing wheel and send the wheel position via MAVLink.
Project Log
Uploading the Firmware
 Ardurover being flashed to the APM before installation. Ardurover can be downloaded from the APM website. Tutorials and project informations are provided in the website. Ardurover was uploaded on the HKPilot Mega and the RC_Override function was verified on the Mission Planner. Issue#1 The wheel had a small delay in representing the data on Mission Planner. Whether this will affect the system performance should be verified when building a prototype.
Hardware Integration

 A Bracket to install the gopro was integrated to the chassis of the rover. No glue or adhesives were applied for the replacability. Issue#02 Mounting the camera was a big issue to solve in the project. The mouting is a temporary solution but is unappropriate for rough terrain. Issue#03 Additional wiring had to be done to supply power to the video transmitter and the APM. Control Verification Issue#04 There was a significant delay observed in the control using MAVLink. The reason was due to the packet loss of using a bad antenna for the telemetry. The problem was solved The solution was to use a higher gain antenna. The delay was significantly reduced.


Pingback: How to make low latency video camera with Raspberry Pi and Raspberry Pi camera | 404warehouse
Hi, thanks for the great posting and I’m very interested in this project. I’m thinking of building a similar tele-driving system by myself, but I have some questions before I start. I’m planning to use Erle Rover (https://erlerobotics.com/blog/product/erle-rover/) for teleoperation (not sure). I will really appreciate it if you can provide me a purchase list for all the required hardware that I can start. And I’m not sure how you connect the Logitech steering wheel with ground station and send the wheel control to the rover. Is it a special Logitech steering wheel I need to buy or the ground station (mission planner) can just automatically identify the Logitech steering wheel? Thanks a lot!
LikeLike
Hii sir, I am also using amp and mission planner in my project but i am not able to connect telemetry plz help me
LikeLike
How can I help?
LikeLike
actually, sir, i have connected telemetry to the vehicle but it’s not sending signals
LikeLike